
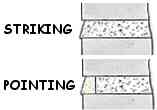
Striking and Pointing brickwork
The difference between 'striking' and 'pointing' is that:
- Striking is finishing the mortar joints between newly laid bricks.
- Pointing is applying a small amount of mortar into the face joint between bricks (either newly laid or in old brickwork). In new brickwork, pointing can apply harder mortar to increase weather protection on exposed faces. In old brickwork, pointing is often used to repair mortar joints which have been eroded by exposure to the elements.
Styles of finishing
Whether striking or pointing, the basic finishes are the same:
FLUSHED
 Flush finishing can be difficult to achieve due to the irregularities of most mass produced bricks.
This is achieved by drawing a strip of wood about 12mm wide, 6mm thick and 100mm long along the joints after the mortar has started to go off.
This is probably the easiest finish for a new diyer to achieve.
WEATHERED
 Weathered finishing throws off rain water and is considered to be fairly durable but it is difficult for a diyer to achieve a good finish.
The joint is made by drawing the blade of a small trowel, tilted slightly inwards at the top, backwards along the joint, the top edge of the trowel being in contact with the underside of the bricks above the joint being struck.
For vertical joints, the edge of the trowel is in contact with one of the side bricks and is inclined by the same amount as the horizontal joint. Keep the direction of the vertical strikes the same all over a wall, otherwise it may look peculiar.
HOLLOW KEY
 Hollow key - is formed by pulling a suitable curved or round shaped piece of metal (i.e. tube or rod) along the joints.
STRUCK
 Struck jointing should not be used for exterior facings as it leaves the upper edge of the lower brick exposed to the weather.
The actual procedure is similar to the weathered finish above, except that the trowel is angled inwards at the bottom of each horizontal joint.
RECESSED KEY
 Recessed key - the mortar needs to be racked out to a consistent depth from the face of the wall and then the face of the mortar is pressed back firmly using a metal jointer tool or a piece of wood. A tool known as a 'chariot', which is designed to recess the joint evenly, can also be used.
Generally it is not recommended for external brickwork as water will collect in the recess.
Striking.
Bricklaying should be stopped at a convenient point to allow enough time to strike the section of wall laid.
- Except for the recessed finish, the first job is to fill in any parts of the mortar joints which show surface voids, use a small amount of fairly stiff bricklaying mortar and apply using a small/pointing trowel. Do the vertical joints (called 'cross-joints') first, and then the horizontal joints (the 'bed-joints').
- Strike the mortar in the style required. Do the cross-joints first, then the bed-joints.
- Finally, lightly use a soft sweeping brush to remove any crumbs of mortar from the wall. If there are any larger pieces of mortar on the face of the bricks, don't rub them off until the mortar has gone off for 12 hours or so.
Pointing.
(see more details about repointing on this related page)On new brickwork, bricklaying should be stopped at a convenient point to allow enough time to clean out the surface mortar of the section of wall laid. The mortar in the joints should be raked out to a depth of about 12mm from the brick surface. Only point a wall when it has been completed.
On old brickwork, chip out the old mortar or pointing to the depth of about 12mm from the brick surface. Some people use angle grinders to remove the old mortar, if you choose to do so, be aware that it will cause a lot of dust, close all the windows to your house, warn your neighbours and wear a face mask and goggles. Use an angle grinder with care otherwise damage to the actual bricks could result.
When the wall is ready to be pointed, the joints should be wetted before being filled with pointing mortar and finished off as for striking above.
The mortar should be a fairly stiff mix. Put a small amount of the mix on a hawk and use a small pointing trowel to cut off a slither of mortar. Pick the mortar up on the edge of the trowel and press the mortar into the joints to be filled, drawing the blade backwards at the same time, repeat this until the mortar is flush with the face of the bricks. Fill the vertical, cross-joints first, then the horizontal, bed-joints. When the joints over about 1 square metre have been filled, finish off using the required style.
The mortar used for pointing should be a 6:1:1 mix of builders sand/hydrated lime/cement or 3:1 mix of sharp sand/hydrated lime for added weather resistance and possibly coloured for added effect.